Saturday, December 5, 2009

Burda E 842 807


The skirt above is similar to E842-807


Posted by Picasa

DISCLAIMER: PLEASE DO NOT ASK ME HOW MY BRAIN WORKS. THE WAY THAT I PUT THIS TOGETHER MADE NO SENSE WHILE I DID IT AND IT MAKES NO SENSE NOW. ASKING FOR CLARIFICATION WILL ONLY RESULT IN MORE CONFUSION.

This pattern is from a special edition of Burda. I believe that it was the last issue of the petite magazine that was put out. I received a letter from GLP or Burda (I can't remember which) telling me that they would no longer produce them and that they would apply the remainder of my subscription to a subscription to the regular Burda magazine. I promptly cancelled it. Now I wish I hadn't.


I liked that this skirt had six seams because more seams usually equal a better fit. In typical "me" fashion, I mistakenly put the back piece on the fold and cut the front piece down the middle, and it went downhill from there.


I used very old black and white houndstooth fabric that my mother had given me.  Early on I saw that I had the makings of three holes in my fabric (probably dry rot), so I wasn't too concerned with the outcome and decided to use the skirt as a muslin and experiment by sewing the skirt with exposed serged seams. I serged all of the sides of all of the pieces including the lining, then I changed my mind and decided to serge the seams of the fabric together without using the knife to cut the fabric. THEN I realized that the skirt was far too big, so I stitched a 5/8" seam. This meant that the serged seams were just flapping around out there, so I stitched them down.

I wound up with a zipper on the side back instead of the center back since I had no center back seam. I inserted the first invisible zipper perfectly, and for some reason all of the teeth no longer gripped. I replaced it begrudgingly. Since the zipper was inserted in the side back seam, the right side differs from the left: the left side has three exposed serged seams and the right side has two. I settled on asymmetry. I made a vent at the bottom of that seam and top stitched the edges of the vent and the hem because the thread was not visible on the fabric and the edges were already finished.

Despite all of this, I really like the skirt except for the assymetry. That will not be a problem the next time because I'll be more careful next time. I will cut the front piece on the fold instead of the back, which is what started the domino effect. I might use the denim that I've been itching to get cut into. I will wear this until the holes in the fabric make this impossible.

Thursday, November 26, 2009

Burda 11-2009-122


Although the pleats intimidated me, I knew that I had to try to make this skirt. I made it out of a tan wool crepe and lined it with the striped lining that I bought tons of and use for everything.


Since I have such a short attention span, I couldn’t read all of the directions. I did it my way. **Cue Frank Sinatra singing**
  • I serged all of the edges of the fabric and lining, including the pockets before I began sewing, which saved me from having to go back and finish the seams.
  • I added about five inches to the length since everything that I make turns out too short, and I am very short to begin with. I don’t like anything to be above my knees. It’s a bit longer than I intended, but since it turned out so full, the length works.
  • I attached the front of the waistband (the part that is seen) to the front of the skirt and the back of the waistband to the lining. I placed the skirt and lining right sides together and sewed them at the top of the waistband.
  • I sewed the tops of the pockets that were to double as belt loops closed.
  • I omitted some of the top-stitching
  • At this point I haven’t hemmed it, but have left the serged edges exposed.
  • The pleats are more open than on the line drawing. This is either because of my hips or because I didn’t ensure the pleats were totally closed when I sewed the pockets on.
I like it! It looks great with boots. I won’t make it again because one is enough, but I find it amazing that my best results come from Burda patterns. Hmmm…

New Look 6159


I made view C -- the skirt. This is probably the easiest thing I’ve sewn. EVER. I didn’t even read the instructions. Three pattern pieces — that’s all. I made it out of the same material that I made the Burda top (06-2009-122) out of. I cut a 14 in the waist and morphed it into a 16 at the hips. I made it a bit too big and I will make it shorter in the front because my butt hikes up the skirt in the back.


I used a centered zipper because I didn’t feel like fiddling with an invisible one.

BTW, it looks much better in real life!


The Burda and Simplicity set together. I don’t think I’ll wear them together.

McCall's 2401 and Burda 06-2009-122


McCall's 2401

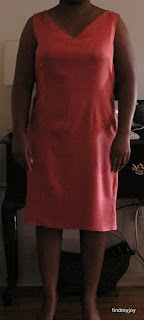
This was an easy dress to sew, but I had to change the shape of the hip. I have flatter hips than I used to have (read: I’m now a rectangle), so I had to change it using a French curve.


I’m really going to have to learn to do the swayback adjustment. And, yes, I’m holding my stomach in. I wore this with a tummy control garment, so this is pretty much what I looked like.

This is definitely the motivation I need to go running today. Besides that, the weather is GORGEOUS! It’s August 31 and it’s 66 degrees!!! I love living in the Northeast!!!

I also sewed a Burda top from the June 2009 issue (#122). I didn’t care for much from this issue, but this top was cute. It’s kind of funny that while I’m running to get in shape, I’m sewing like a fiend to accommodate my larger body.


I cut this pattern out about a month ago and put it away. I just got to it last night because I REALLY need clothes for work that are larger than a RTW size 8, which is what populates my closet. I’m obviously not a RTW 8 now, but over the next year I want to get back to it.

I added a 5/8″ seam allowance to the fabric, not to the paper pattern pieces. It came together nicely and easily. I sew so slowly that it took me about 7 hours to complete. The next time I sew it, I should be faster.


The only change I made was to make the mock sleeves protrude less from the shoulder by about 5/8″. When I sewed them as they were cut out, it put me in the mind of the meanest dinosaur in the world:


Don’t ask.

I haven’t put the drawstring on, and that should help with the shaping of the garment. Putting the rest of the buttons on will help the drape. I’ve done the buttonholes and three buttons already, but I hate handsewing, so the other four buttons will have to wait. I’ll update when I do it.

May I say that I am very impressed with how easy this pattern was to put together. I’m going to start on a skirt from the September issue, which, again, I love!

Updated 9/7/09

I sewed the drawstring and the casing. I don’t think I will sew on the remaining buttons. I ‘m just going to sew the bottom part of the opening closed.


Again, I’m happy with the result. It was easy to put together and is very comfortable to wear. I might make another.

Burda 2996


I bought this pattern in 2004 when I took a sewing class through LSU. It was an extension course held one evening a week. The pattern was cut on a 12 at the shoulders and the waist and hips were cut on an 18. I obviously was almost as big then as I am now. I cut it a little bit larger, but I took in the two front darts a bit more because it came out too large. The instructor had raised the back darts and had given me a v-neckline (at my request).

I find that the hips of this pattern don’t have such a dramatic change from the waist as other patterns I’ve used. I usually have to redraw the waist to hip line on the pattern so that I don’t wind up with poufs of fabric because I’m no longer shaped like an hourglass, but more rectangular. I didn’t have to do that with this pattern. Maybe what I’ve read about Burda patterns is true – they’re drafted to allow for a differently- shaped woman than the Big 4 drafts for. Makes me happy that I subscribed to BWOF.

By the way, I’m loving the September 2009 issue. I can’t wait to actually sew a pattern from that issue!


Things to work on:

*My hemline seems even from the sides, but is obviously uneven from the front.
*My neckline won’t lay flat.
*A swayback adjustment is needed.

This is the second dress that I’ve made for my larger body. I decided to sew clothes with material that I already have instead of buying clothes that I might not be able to fit in the next year. If my girth is permanent, then I’ll start buying new clothes. Until then, I’ll have fun trying to improve my sewing skills!

Kwik Sew 3156


I made the pants from the same blue fabric with which I made the ill-fated skirt with the yoke that I’ve given up on. I took my measurements and adjusted the pattern, shortening in two places. I did fine on the top measurement (crotch length), but I took too much from the bottom, so they are horrible. I would really like to make something where I get a payoff that’s not conditional or that does not need an excuse.

Friend: Oh, that’s nice.

Me: Thanks, but [insert reason for constant tugging of clothes because of bad fit]

I basted the pants together first, then when I realized that the pants were okay except for the length (which is not correctable), I serged them together. They were so short and flared that I decided that I would not wear them out, but they would be great for lounging around the house. I serged the bottom edges.

AND, NO, I’M NOT PREGNANT!!!


What I learned:

taking and applying measurements to pants

Even if I made them longer I still would not like the way they fit me. I’m giving this pattern away.

Simplicity 9825


As much as I thought I would love this skirt, I hate the way that it came out. I made it too small and I could not for the life of me figure out how to sew the waistband. I had tried to sew it a few years earlier and had the same problem. The waistband was too large and and I couldn’t figure out how to complete it.

Determination: Wadder.


Since I have a few unexpected days off from work, I’ll try this again tomorrow. I will make the following changes:

Make a larger size (16)

Use a different material (not knit)

Figure out the waistband instructions

Use the invisible zipper instructions instead of the centered

Update (6/13/09)

Since I realize that I won’t learn by leaving projects unfinished, I removed the yoke and zipper. I reapplied the yoke and used an invisible zipper this time. The skirt still did not fit my waist. I should have eased the waist more into the yoke.

What I’ve learned:

How to insert an invisible zipper

How to insert a yoke